Authoring – Testing in the Editor
Test a DMN model locally with the DMN Runner before publishing. These guides require Authoring access and a running Extended Services instance.
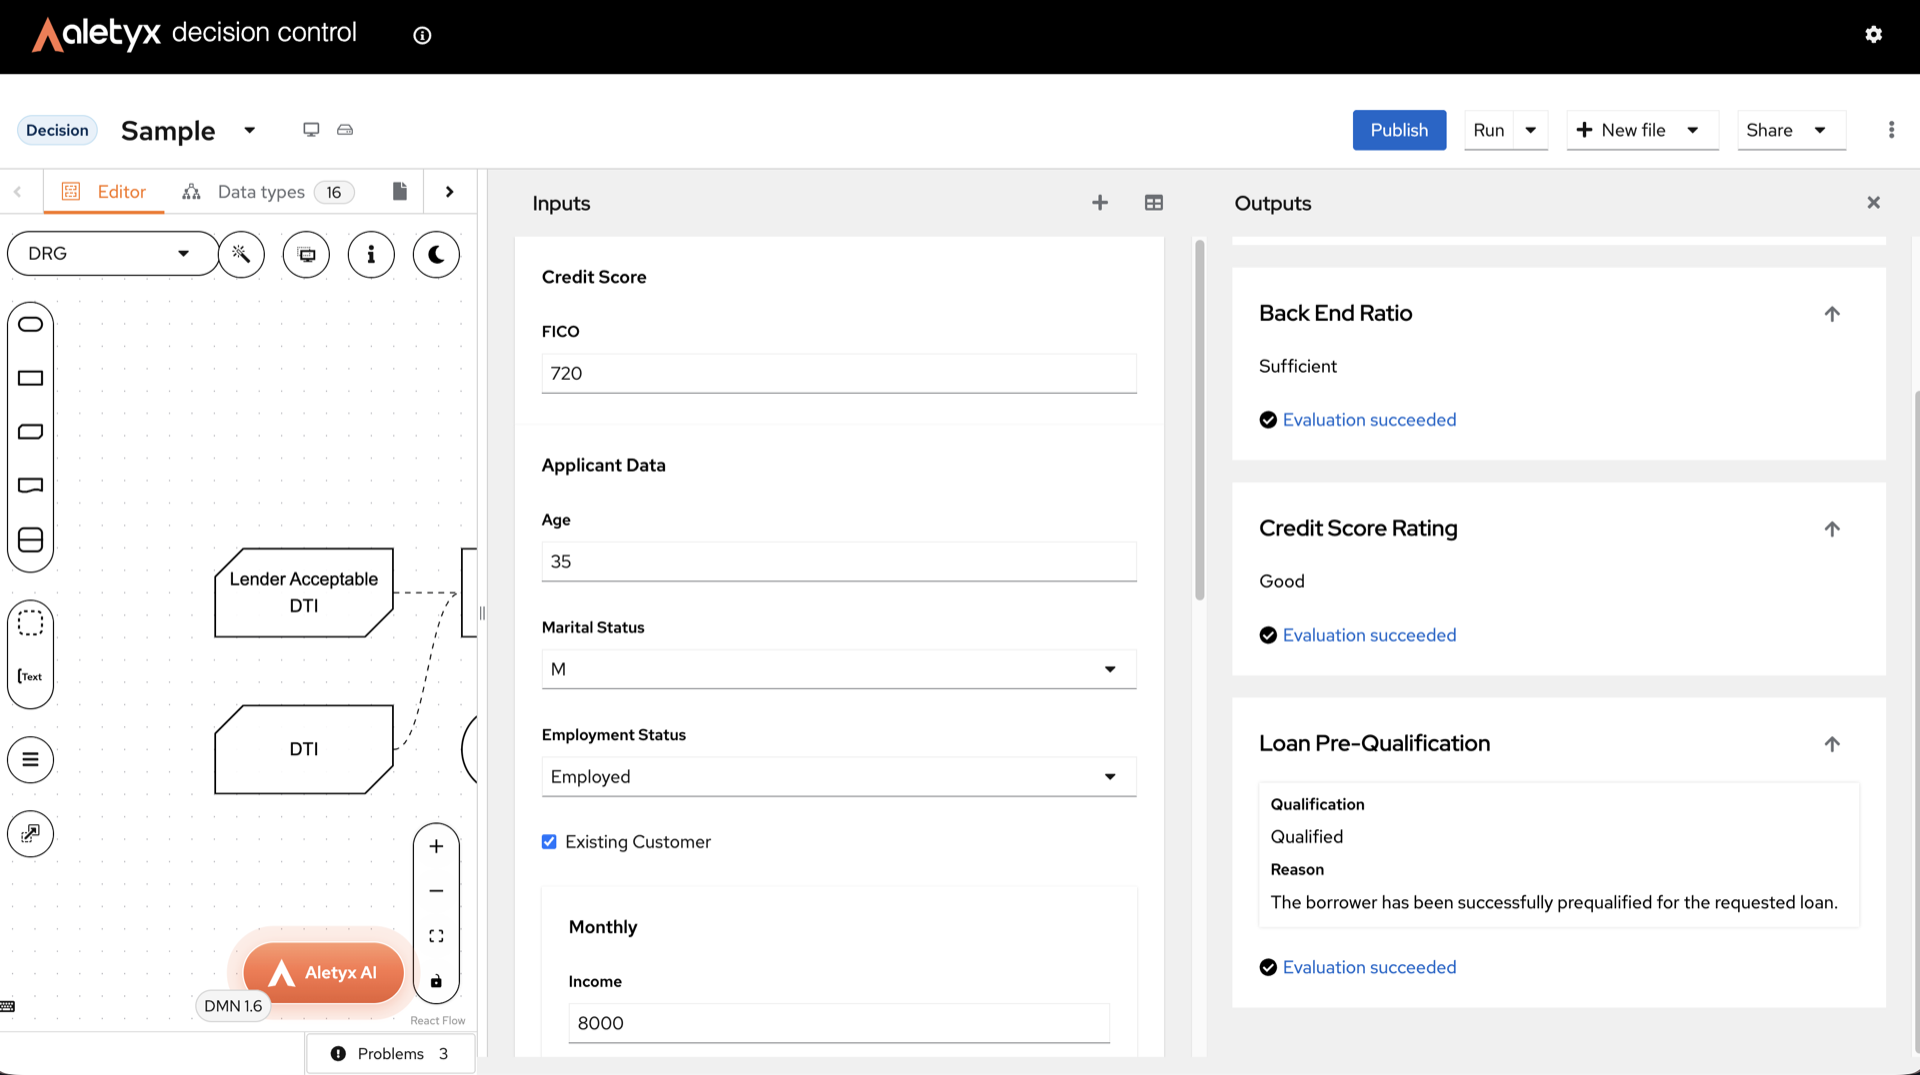
The DMN Runner takes over the right side of the editor, split into two panels: Inputs on the left (one field per Input Data node) and Outputs on the right, evaluated live as you fill the inputs.
How to test a model with sample inputs
Run a DMN model locally against sample inputs and see live outputs.
Prerequisites: A .dmn/.dmns file open; Extended Services running (you are prompted to start it if not).
Steps:
-
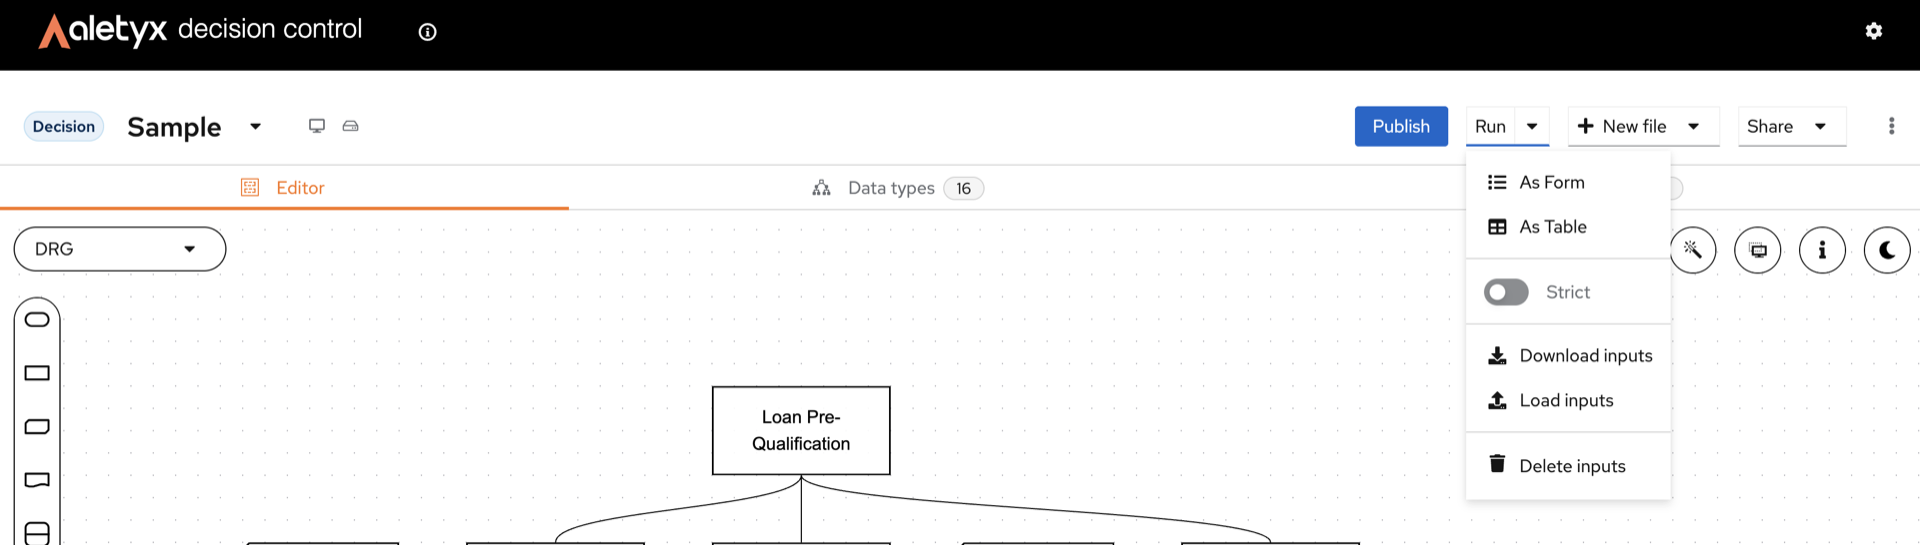
In the toolbar, open the Run ▾ menu and choose As Form or As Table.
-
In the DMN Runner panel, enter values in the generated inputs.
Verify: The output section updates automatically with evaluated results — the Outputs cards show real values instead of (null) / "Evaluation skipped".
How to manage test input rows
Maintain multiple input scenarios for a model.
Prerequisites: DMN Runner open (see How to test a model with sample inputs).
Steps:
- Click Add row to create a scenario.
- Use the Row N dropdown to switch scenarios.
- (Optional) Toggle Strict mode in the Run menu.
Verify: The selected row's inputs and outputs display in the panel.
How to save, load, or clear test inputs
Persist or reset your test data.
Prerequisites: DMN Runner open.
Steps:
- Open the Run menu.
- Choose Download inputs (saves a
.json), Load inputs (pick a.json), or Delete inputs (then confirm).
Verify: Inputs are downloaded, loaded into the rows, or cleared, respectively.